Help: Join a class
When students sign up for their own accounts with their own email addresses, usernames and passwords (as opposed to the numbered Child Student accounts), the teacher can have them join a class, which converts their account to a Mature Student account, giving the teacher access to monitor their quiz activity.
You can read more about the two types of student accounts.
There are 4 steps to this process, summarized below:
- Create one or more classes, if you haven't already, using the Add New Class screen on your Teacher Dashboard. Use 0 for the number of students. You will also have to choose a class password, even though students will be using their OWN chosen passwords. (Sorry, it's a bit odd, but if you ever need to set up a generated account, it will need this password.)
- Instruct your students to sign up for their own accounts. Remind them that you will be able to see the usernames that they pick, so they should not put something that might be embarrassing for their teacher to see. We recommend students do not use their full real names as their username. After creating the account, they will need to go to their emails to activate their accounts, just as you did when you set up your Teacher account.
- Give your students the class name, either verbally, on a handout, or perhaps through email, and ask them to JOIN this class. Remember to include the "s." at the front of the class name - it is a necessary part of the class name. Instruct the students to look in their "My Account" menu for an item called Join or leave a class and click on this to go to the Join class screen.
- The student joins the class by going to the join a class screen and following the instructions. On this screen, the student is authorizing his teacher to have access to view his scores. Also, because you may not recognize the username the student signs up with (since sometimes they tend to pick silly user names), you can ask your students to input the "Name or identifier" that you will see on the class results page alongside the students' user names.
Details of Step 4 - The student joins the class
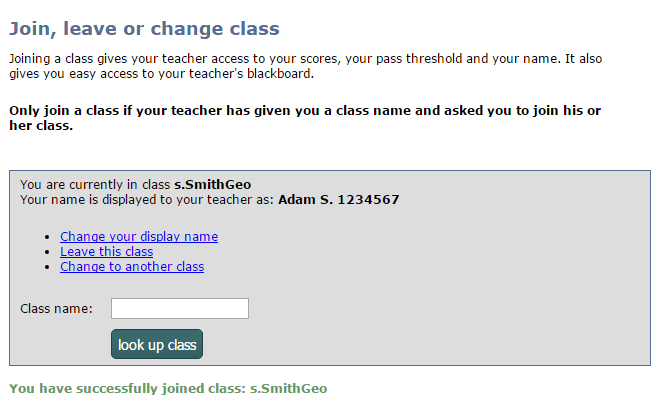
After the student has created and activated his account, he should sign in and look in his My Account menu for the Join or Leave Class, as shown in the screenshot below:

On the Join screen, the student types in the name of the class you gave him, and then clicks the look up class button:

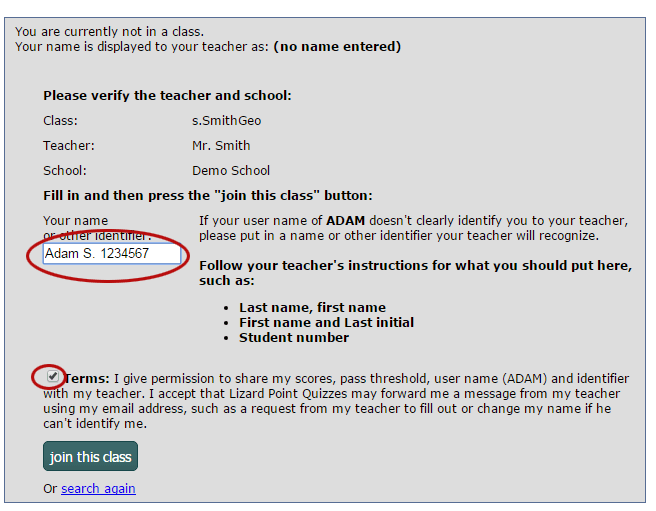
After reviewing the name of Teacher and School, to make sure he has the right class, the student needs to accept the TERMS (to authorize your access). Optionally, he can input a name or identifier. Please give your students instructions on what they should put here. If they leave it blank, you will only have their username to identify them by. You and the student will be the only ones to see this identifier - it will not be publicly viewable anywhere. Still, you might wish to instruct your students NOT to put their full last name. Perhaps a first name, first letter of their last name, and student number, as is shown in the following screenshot.
When the student clicks join this class, and gets a green "success" message at the bottom, he is done. You will be able to see his account in your My Class Results screen.